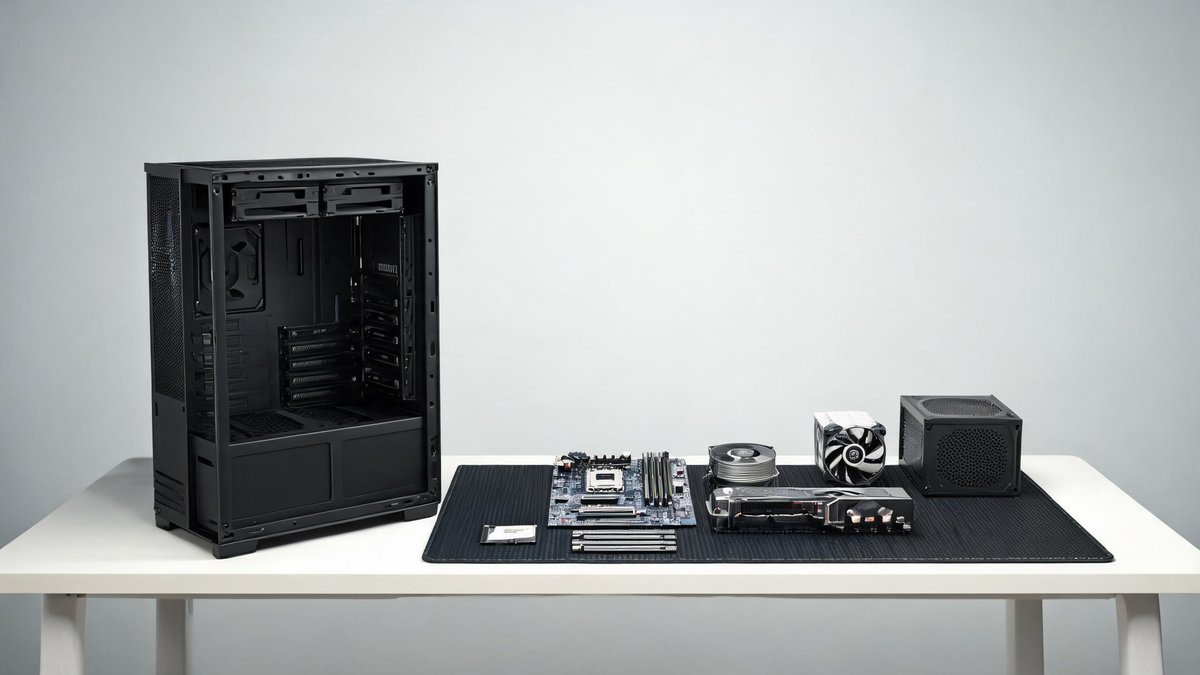
Building a gaming PC sounds intimidating until you realize it is essentially expensive LEGO. Every component snaps or screws into place in a specific orientation, and if a part does not fit, it goes somewhere else. The intimidation factor is the single biggest reason people overpay for pre-built gaming desktops that use cheaper power supplies, slower RAM, and no-name motherboards to hit a price point. In 2026, you can build a 1080p gaming PC for about $650 that runs modern titles at 60 to 100 frames per second on high settings, and you can do it in one afternoon with a Phillips-head screwdriver and a YouTube tutorial. This guide walks you through every component, what matters and what does not, and gives you a complete parts list with real current pricing.
The CPU and Motherboard: Start With the Right Platform
The CPU choice determines your motherboard socket, which determines your upgrade path for the next three to five years. In the budget space, AMD's AM5 socket on the Ryzen 5 7600 ($189) is the strongest starting point. AM5 launched in 2022, and AMD has committed to supporting it through at least 2027, meaning you can drop in a next-generation CPU years from now without buying a new motherboard. The 7600 is a six-core, twelve-thread chip with a boost clock of 5.1 GHz that handles gaming and light streaming effortlessly.
On the Intel side, the Core i5-13400F ($169) offers slightly better productivity performance and draws less power at idle. The LGA 1700 socket it uses, however, is at the end of its life with no upgrade path. The core claim: AMD AM5 is the smarter long-term investment. For the motherboard, a B650 board like the ASRock B650M-HDV/M.2 ($129) provides PCIe 5.0 support, two M.2 slots for SSDs, and stable power delivery for future CPU upgrades. The practical takeaway: Ryzen 5 7600 plus B650 motherboard is the budget build foundation that does not lock you out of upgrades.
The GPU: Where Most of Your Budget Should Go
The graphics card determines your gaming performance more than any other component. In 2026, the sweet spot for budget 1080p gaming falls between $220 and $280. The AMD Radeon RX 7600 ($249) delivers 8 GB of VRAM and sits at the top of 1080p benchmarks, pushing 80 to 100 FPS in games like Call of Duty and Apex Legends at high settings. The Intel Arc B580 ($219) has closed its driver gap and now competes directly with AMD at a lower price, offering 12 GB of VRAM that helps in texture-heavy games. The NVIDIA GeForce RTX 4060 ($289) costs more but adds DLSS upscaling and better ray tracing support.
Tech Fact: The 3-2-1 backup rule — 3 copies, 2 different media types, 1 offsite copy — is the gold standard for data protection. Cloud backup services automate the offsite copy for under $10/month.
The core claim: spend roughly one-third of your total budget on the GPU. A $250 GPU in a $650 build hits the right balance. Skimping on the GPU to buy a nicer case or faster storage is the most common mistake first-time builders make. The practical takeaway: buy the RX 7600 for the best pure 1080p gaming performance per dollar. Buy the Intel Arc B580 if you need the extra VRAM for games like Hogwarts Legacy or heavily modded Skyrim. Buy the RTX 4060 if you value DLSS and ray tracing.
RAM, Storage, and Power Supply: The Unsexy Parts That Prevent Disaster
For RAM, buy 16 GB (2 x 8 GB sticks) of DDR5-5600 or DDR5-6000 memory. A 32 GB kit costs an extra $40 and is worth it if you keep browser tabs open during gaming or do any video editing, but 16 GB runs every game on the market without issue. The brand matters less than the speed and the dual-channel configuration: two sticks perform better than one because they operate in parallel. A kit like the G.Skill Flare X5 16 GB DDR5-6000 costs $59.
For storage, a 1 TB NVMe SSD costs around $55 and loads Windows and games in seconds. The Western Digital SN580 and TeamGroup MP44L are consistently reliable budget picks. Skip the hard disk drive entirely unless you store large media archives. For the power supply, the most critical safety component, a 650-watt 80 Plus Gold unit from a reputable brand like Corsair, EVGA, or Seasonic costs about $79 and provides clean, stable power with a 7- to 10-year warranty. The practical takeaway: 16 GB DDR5-6000, 1 TB NVMe SSD, and a 650W Gold PSU are the standard budget build baseline. Do not go cheaper on the power supply.
The Case and Cooling: Spend Just Enough, Not More
A quality budget case costs $55 to $70 and includes pre-installed fans that provide adequate airflow out of the box. Look for mesh front panels rather than solid plastic or glass, because mesh allows fans to pull in cool air. The Corsair 3000D Airflow ($69) and Fractal Design Pop Air ($79) lead the budget case market with included fans, dust filters, and cable management straps.
For cooling, the stock cooler included with the Ryzen 5 7600 handles gaming temperatures adequately, though it gets audible under load. A $25 tower cooler like the Thermalright Assassin X 120 SE drops temperatures by 10 to 15 degrees Celsius and runs nearly silent. The core claim: a $60 mesh case plus the AMD stock cooler or a $25 tower cooler is all the cooling a budget gaming PC needs. The practical takeaway: do not buy a $100 liquid cooler for a $650 build. That money belongs in the GPU budget.
Putting It Together: The Build Sequence and Common Mistakes
Build in this order: install the CPU into the motherboard socket, lock it, and apply a pea-sized dot of thermal paste if the cooler does not come with pre-applied paste. Mount the cooler, then install the RAM sticks in the correct slots marked on the motherboard. Mount the motherboard into the case using the included standoffs, then install the power supply. Connect the front panel headers (power button, USB ports) using the motherboard manual diagram. Install the GPU into the top PCIe slot, which is the one closest to the CPU. Connect the power cables: 24-pin motherboard, 8-pin CPU, and PCIe power to the GPU.
The most common first-time mistake is forgetting to flip the power supply switch to the on position. The second most common is plugging the monitor cable into the motherboard instead of the GPU, which gives you a black screen because the Ryzen 5 7600 does not have integrated graphics. Plug the HDMI or DisplayPort cable into the graphics card, not the motherboard. The third most common mistake is forgetting to install motherboard standoffs, which can short the board against the case metal. The practical takeaway: watch a build video for your specific case and motherboard before you start. Pause it at each step. The build takes two to three hours the first time and 45 minutes the second time.